Sunday, October 30, 2011

We've Moved!


I have officially started my new blog page at laurassweetspot.com

That's right... I'm a dot com now! All grown up.

So PLEASE, come check out the new site. 

All of the old recipes are there.

As well as some incredible new ones. 

Hope to see you soon! 

; D

Saturday, October 29, 2011

This Weeks Delish!

Halloween weekend is officially upon us! Unfortunately my daughter is so young that I wasn't able to have her help me make any fun Halloween treats, but hopefully some of you were able to share that experience with your kids. Next year I will join you! haha Until then, here are some fun filled recipes that I found:


  • This recipe does require a special tin, but aren't they cute? And who doesn't love pumpkin cake!?

  • This recipe is not only a great looking craft, but how delicious do they sound... oreo pumpkin cheesecakes? And with the orange creme oreo's, they are just a perfect Halloween dessert.

  • This is a very clever recipe! If you are a big decadent treat fan than you'll love these pumpkin truffles, which are like little balls of pumpkin pie dipped in white chocolate. 

  • Here is an easy effect to achieve for those of you that aren't too crafty in the kitchen. All you need to do is make circles with some melted white chocolate and then drag a toothpick outward and you have a spiderweb a top delicious brownie bites! Easy, right?

  • Look- ghost pop's! Adorable. Plus, they are black velvet cake pops with cream cheese frosting.. you can't more delicious than that. And if making your own cake and frosting is too complex, just borrow the decorative ghost idea. You can always make cake pops from the box mix and the frosting can.

This Weeks Pick:

No doubt in my mind, I have to encourage you to make homemade bagels. They were incredible. And they are not as difficult as they seem. Once you make them, you will realize that and be so thankful you took the challenge. Do it, I dare you!


Friday, October 28, 2011

Apple Cake


This apple cake is different than any I have ever had before.


Imagine 75% apples and 25% batter. Yeah. I'm serious.


I never expected it because the recipe seemed so simple... but as soon as I saw the bowl full of apples next to the bowl full of batter I knew something different was going to happen with this cake. 


And the lack of cinnamon!! What kind of apple cake doesn't have cinnamon!?


The kind of apple cake that screams vanilla-rum. You heard me. Vanilla-rum. This was the first time that I tasted the combination and wow! It's truly a show stopper.


I need to point out to you something very important about any kind of fruit dessert. The end result will be only as good as the fruit you use. SO! If you have unripe fruit, you won't get the most flavor out of your dessert. More importantly with this cake... if your apples are dry and gross, they will be in your cake too. So use GOOD apples. Or you'll be kicking yourself in your butt!


This is truly a special cake. One that looks rustic, but rocks a surprisingly sophisticated flavor. And with the simplicity of the batter, you would never know how great this cake was unless somebody told you. 


I'm telling you. This cake is great.


It is quite moist and dense so please be sure not to cover it with plastic wrap or something similar. It might get soggy. I assume you don't like soggy cake. Am I right? Good. I simply placed a cloth loosely over the cake because there is no way I can let something sit out uncovered. I just can't. I get shaky. 


This is definitely one of those cakes that is the best the day it is made. So try serving it when you have company. Unless you already have a household full of guests that will readily scarf it up.  


Also, one quick note- this calls for a 8" springform pan. I used a 9". No biggie. Just check it 5 minutes sooner.


Let me show you how easy this cake is:


Peel and slice 4 good apples. They can be any apple. They can all be different if you want even. Then you'll want to melt some butter. Mix your dry ingredients. Then mix your wet ingredients. 


Stir in half the flour to the wet ingredients. Then half the butter... then the other half of the flour, followed by the other half of the butter. Finish by folding in the apple slices. That's it! 


Once you pour it into the pan, spread the batter and apple slices out as evenly as possible. You'll have something that looks as beautiful as this. 


Bake it for about 50 minutes or until it is gorgeous golden brown. Doesn't it just look so rustic or delicious!?


Check out how moist that cake looks. And forget about getting a bite without any apple slices. It'll never happen. 


Now the real way to dress up this cake is with sweetened whipped cream, but all I had was some powdered sugar. So feel free to go that route too. 


Marie-Helene's Apple Cake
adapted from "Around my French Table" by Dorie Greenspan
Print Recipe


¾ cup all-purpose flour
¾ teaspoon baking powder
Pinch of salt
4 large apples (if you can, choose 4 different kinds)
2 large eggs
¾ cup sugar
3 tablespoons dark rum
½ teaspoon pure vanilla extract
8 tablespoons (1 stick) unsalted butter, melted and cooled

Center a rack in the oven and preheat the oven to 350 degrees F. Generously butter an 8-inch springform pan and put it on a baking sheet lined with a silicone baking mat or parchment paper.


Whisk the flour, baking powder, and salt together in small bowl.


Peel the apples, cut them in half and remove the cores. Cut the apples into 1- to 2-inch chunks.
In a medium bowl, beat the eggs with a whisk until they’re foamy. Pour in the sugar and whisk for a minute or so to blend. Whisk in the rum and vanilla. Whisk in half the flour and when it is incorporated, add half the melted butter, followed by the rest of the flour and the remaining butter, mixing gently after each addition so that you have a smooth, rather thick batter. Switch to a rubber spatula and fold in the apples, turning the fruit so that it’s coated with batter. Scrape the mix into the pan and poke it around a little with the spatula so that it’s evenish.


Slide the pan into the oven and bake for 50 to 60 minutes, or until the top of the cake is golden brown and a knife inserted deep into the center comes out clean; the cake may pull away from the sides of the pan. Transfer to a cooling rack and let rest for 5 minutes.


Carefully run a blunt knife around the edges of the cake and remove the sides of the springform pan. (Open the springform slowly, and before it’s fully opened, make sure there aren’t any apples stuck to it.) Allow the cake to cool until it is just slightly warm or at room temperature. If you want to remove the cake from the bottom of the springform pan, wait until the cake is almost cooled, then run a long spatula between the cake and the pan, cover the top of the cake with a piece of parchment or wax paper, and invert it onto a rack. Carefully remove the bottom of the pan and turn the cake over onto a serving dish.


Serving
The cake can be served warm or at room temperature, with or without a little softly whipped, barely sweetened heavy cream or a spoonful of ice cream. Marie-Hélène served her cake with cinnamon ice cream and it was a terrific combination.


Storing
The cake will keep for about 2 days at room temperature and, according to my husband, gets more comforting with each passing day. However long you keep the cake, it’s best not to cover it — it’s too moist. Leave the cake on its plate and just press a piece of plastic wrap or wax paper against the cut surfaces.

Wednesday, October 26, 2011

Chocolate-Peanut Butter No Bakes


These cookies have quite the reputation. Not only are they simple because they require no baking, but they are incredibly easy to put together and delicious to boot.

Be absolutely sure to boil the mixture for the full 90 seconds. If you don't do this then the oats won't be cooked at all. They won't be cooked entirely anyways, but they should be softened. It's the boiling that does that job.


Honestly since these cookies are so simple I can't say much more about them...

Except that you should make them. They are delicious.

Also, if you are a fan of no bake treats you may want to check out the chocolate chip cookie dough truffles and the Oreo Cheesecake Cookies on my site.


Chocolate Peanut Butter No Bakes
adapted from "Baked: Explorations" by Matt Lewis and Renato Poliafito
Print Recipe

1/2 cup whole milk
2 cups sugar
1/4 cup unsweetened cocoa powder
1/2 cup (1 stick) butter, cut into 1/2" cubes, softened
1 cup peanut butter, smooth or chunky, but not natural
3 cups rolled oats
1 tsp vanilla extract

Line two baking sheets with parchment paper.

In a heavy saucepan over medium heat, stir together milk, sugar, cocoa powder, and butter until the butter is melted and the sugar is disolved. Bring the mixture to a boil, stop stirring, and boil for a full 90 seconds. Remove the pan from the heat and add the peanut butter, oats, and vanilla. Stir until the mixture is combined.

Use a small ice cream scoop with a release mechanism or, alternatively, a tablespoon to drop the no-bake cookies onto the baking sheet (leave some room around them; they will spread). Let the cookies cool, the refrigerate them for at least 1 hour. They can be eaten directly from the refrigerator or at room temperature.

Store the cookies between layers of parchment paper in a tightly sealed container for up to 3 days.

Tuesday, October 25, 2011

Butternut Squash Soup with Cider Cream


There are countless numbers of butternut squash soup recipes out there. Honestly I am hesitant to say which I think is best. There are way too many options that are so very good. I picked this one because I enjoy the many ingredients that highlight apples.


I absolutely looooove apple cider. I feel like it's just one of those components that dictates the onset of fall. I know we'll soon be moving into winter here but it's still October so stay with me here!


The cider cream in this recipe is obviously optional. It is simple to make and adds an extra "something special" to this soup. The creamy cool, tanginess of the topping is a fantastic contrast to the warm, smooth soup. Cozy...


Please, please, pleasssse... when you use leeks, you NEED to wash them! This is how I do it- I slice the leeks however dictated in the recipe, then I place them in a bowl of water and gently push the rings apart so that the sand in between the layers can come off. Let them sit in the water for 5 minutes or more. The sand and dirt will be gathered at the bottom. I pick them up in handfuls, right out of the water without disturbing the water much. Lay them out on paper towels or a cloth and pat them dry. No matter how clean you think your leeks are to begin with, trust me they are NOT. I've had too many meals ruined by the sand in leeks... definitely learned my lesson the hard way.


Butternut Squash Soup with Cider Cream
adapted from "The Bon Appetit Cookbook" by Barbara Fairchild
Print Recipe

5 Tb butter
2 1/2 lb butternut squash, cubed and roasted (about 6 cups)
2 cups chopped leeks (white and pale green parts only; about 2 large)
1/2 cup chopped peeled carrot
1/2 cup chopped celery
2 small granny smith apples, peeled, cored, and chopped
1 1/2 tsp dried thyme
1/2 tsp dried sage leaves
5 cups low salt chicken broth
1 1/2 cups apple cider, divided
2/3 cup sour cream
1/2 cup whipping cream

Melt butter in heavy large pot over medium-high heat. Add squash, leeks, carrot and celery. Saute until lightly softened, about 15 minutes. Mix in apples, thyme and sage. Add broth and 1 cup cider.; bring to boil. Reduce heat to medium-low, cover, and simmer until apples are tender, stirring occasionally, about 30 minutes. Cool slightly.

Working in batches, puree soup in blender until smooth. Return soup to pot. Or puree with immersion blender. Season to taste with salt and pepper.

Boil remaining apple cider in heavy small saucepan until reduced to 1/4 cup, about 5 minutes. Cool. Place sour cream in small bowl. Whisk in reduced cider.

Mix whipping cream into soup. Ladle soup into bowls and serve with dollop of cider cream.

Monday, October 24, 2011

Bagels

Unless you live in NYC and get them fresh from the bakeries in the morning, you've never experienced a bagel until you've made your own. I will forever be making my own bagels now. Yup. No more Thomas's or Lender's for this family.

And when you think about the idea of homemade bagels you instantly imagine a terribly complex process that is nearly impossible. It's not, I swear. It's a little daunting to read through at first, but when you go through the motions for the first time you'll realize, it's not bad at all. Let me walk you through the process!


Take the flour, water and yeast and mix together to make a sponge. You don't have to do this with an electric mixer. You can do it by hand. If you do, you're crazy though, this dough is pretty dense. 

Make sure you let the dough sit long enough for it to bubble to the point of deflation when tapped against the counter, about two hours. I ended up letting my sponge rise for an hour, then putting it in the fridge for a while because something came up. When I came back to it about two hours later, I set it back out at room temperature again for about another hour. 


By the end of the sponge's rising period it will look like this and the bubbles will pop and it will deflate a bit when tapped against the counter. 


At this point, add the remaining flour along with the yeast, salt, honey/malt/brown sugar.
As you can see I used honey.

Knead it for 10 minutes or until you can stretch it without it tearing and it passes the window pane test. 


You'll end up with a very dense, beautifully elastic dough. 


Divide the dough into balls weighing 4.5 oz each. There will be about 12 depending on the density of your dough and how much flour you ended up using. 

Cover the balls of dough with a damp towel and let them rest for about 20 minutes.


Shape the dough balls by pressing your thumb into the center and stretching into a ring with a diameter of about 2 to 2 1/2 inches. The elasticity will cause the center hole to shrink when placed on the sheet pan, that's why you need to stretch it so large when shaping. 

Set them across two sheet pans lined with parchment that has been misted with cooking spray. 


Spray tops with cooking spray and cover loosely with plastic wrap. 
Let rest for about 20 minutes.


They'll look like this by that time. Not too much of a difference.


They'll be puffed up just a little bit, see.


Now it's time for the float test. Take one bagel, or rather sacrifice one bagel, and drop it gently into a bowl full of cool to room temperature water to see if it sinks. If it does not and stays a float then the bagels are ready to be retarded overnight in the refrigerator. Take the float bagel out and place it back on the sheet pan. Cover the bagels back up with plastic wrap. 
I went so far as to cover them loosely with aluminum foil on top of that.


The next day they will look like this. Take them out of the refrigerator about 30-60 minutes before you want to start making them so that the dough can come up to room temperature. 


Aren't they just awesome looking?


Now once the water comes to a boil, dump in 1 Tb baking soda. 
Plop in as many bagels that will fit in your pot without overcrowding them too much. They are pretty forgiving when they touch, but let's not test our luck here.
Boil them for about 1 1/2 minutes to 2 minutes. The longer you boil them, the chewier they will be.


Flip them onto their other side and boil them again for 1 1/2 to 2 minutes. 


Take a spider strainer or mesh strainer and gently lift the bagels out of the water and onto a sheet pan lined with parchment and dusted with cornmeal. 


You'll want to dust with the cornmeal or else they may be difficult to come off the parchment after baking. I'm telling you this from experience. Don't be cocky now. 


This is what they will look like before going into the oven to bake.
This is where you'll want to sprinkle on any toppings you may want to add.


Here are the beauties, all boiled and baked. 


Not too bad for being homemade, right???


You'll want to slice one open as soon as they cool so you can see how amazing they taste.


See, how perfect the texture of the crumb is. Oh my goodness.... I want one now.


We like to toast our bagels.


Then spread them with some cream cheese. We're a cream cheese family.
Feel free to use butter... jam... whatever your regular bagel accompaniment may be. 


Bagels
adapted from "The Bread Baker's Apprentice" by Peter Reinart

makes a dozen
Print Recipe
Sponge
1 teaspoon (.11 ounce) instant yeast
4 cups (18 ounces) unbleached high-gluten or bread flour
2 ½ cups (20 ounces) water, at room temperature
Dough
½ teaspoon (.055 ounces) instant yeast
3 ¾ cups (17 ounces) unbleached high-gluten or bread flour
2 ¾ teaspoons (.7 ounce) salt
2 teaspoons (.33 ounce) malt powder OR 1 tablespoon (.5 ounce) dark or light malt syrup, honey, or brown sugar
To Finish
1 tablespoon baking soda
Cornmeal or semolina flour for dusting
Sesame seeds, poppy seeds, kosher salt, rehydrated dried minced garlic or onions, or chopped fresh onions that have been tossed in oil (optional)
1. To make the sponge, stir the yeast into the flour in a 4-quart mixing bowl. Add the water, whisking or stirring only until it forms a smooth, sticky batter (like pancake batter). Cover the bowl with plastic wrap and leave at room temperature for approximately 2 hours, or until the mixture becomes very foamy and bubbly. It should swell to nearly double in size and collapse when the bowl is tapped on the countertop.
2. To make the dough, in the same mixing bowl (or in the bowl of an electric mixer), add the additional yeast to the sponge and stir. Then add 3 cups of the flour and all of the salt and malt. Stir (or mix on low speeds with the dough hook) until the ingredients form a ball, slowly working in the remaining ¾ cup flour to stiffen the dough 
3. Transfer the dough to the counter and knead for at least 10 minutes (or for 6 minutes by machine). The dough should be firm, stiffer than French bread dough, but still pliable and smooth. There should be no raw flour – all the ingredients should be hydrated. The dough should pass the windowpane test and register 77 to 81 degrees F. If the dough seems dry and rips, add a few drops of water and continue kneading. If the dough seems tacky or sticky, add more flour to achiever the stiffness required. The kneaded dough should feels satiny and pliable but not be tacky.
4. Immediately divide the dough into 4 ½ ounce pieces for standard bagels, or smaller if desired. Form the pieces into rolls.
5. Cover the rolls with a damp towel and allow them to rest for approximately 20 minutes.
6. Line 2 sheet pans with baking parchment and mist lightly with spray oil. Proceed with shaping the bagels 
7. Place each of the shaped pieces 2 inches apart on the pan. Mist the bagels very lightly with the spray oil and slip each pan into a food-grade plastic bag, or cover loosely with plastic wrap. Let the pans sit at room temperature for about 20 minutes.
8. Check to see if the bagels are ready to be retarded in the refrigerator by using the “float test”. Fill a small bowl with cool or room-temperature water. The bagels are ready to be retarded when they float within 10 seconds of being dropped into the water. Take one bagel and test it. if it floats, immediately return the tester bagel to the pan, pat it dry, cover the pan, and place it in the refrigerator overnight (it can stay in the refrigerator for up to 2 days). If the bagel does not float, return it to the pan and continue to proof the dough at room temperature, checking back every 10 to 20 minutes or so until a tester floats. The time needed to accomplish the float will vary, depending on the ambient temperature and the stiffness of the dough.
9. The following day (or when you are ready to bake the bagels), preheat the oven to 500 degrees F with the two racks set in the middle of the oven. Bring a large pot of water to a boil (the wider the pot the better), and add the baking soda. Have a slotted spoon or skimmer nearby.
10. Remove the bagels from the refrigerator and gently drop them into the water, boiling only as many comfortably fit (they should float within 10 seconds). After 1 minute flip them over and boil another minute. If you like very chewy bagels, you can extend the boiling to 2 minutes per side. While the bagels are boiling, sprinkle the same parchment-line sheet pans with cornmeal or semolina flour. (If you decided to replace the paper, be sure to spray the new paper lightly with spray oil to prevent the bagels from sticking to the surface.) If you want to top the bagels, do so as soon as they come out of the water. You can use any of the suggestions in the ingredients list or a combination. I make a seed and salt blend.
11. When all the bagels have been boiled, place the pans on the 2 middle shelves in the oven. Bake for approximately 5 minutes, then rotate the pans, switching shelves and giving the pans a 180-degree rotation. (If you are baking only 1 pan, keep it on the center shelf but still rotate 180 degrees.) After the rotation, lower the oven setting to 450 degrees F and continue baking for about 5 minutes, or until the bagels turn light golden brown. You may bake them darker if you prefer.
12. Remove the pans from the oven and let the bagels cool on a rack for 15 minutes or longer before serving.

Friday, October 21, 2011

This Weeks Delish!

Wow, have I been baking/cooking up a storm this last week for you guys! Can't wait to show you what's been going on in my kitchen. Look forward to the next few weeks : D


Now let's see what has been brewing in the kitchen of my fellow bloggers this week-


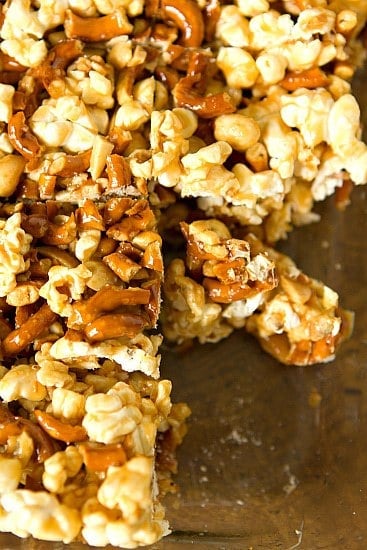
  • Any sweet and salty fans out there? (personally raises hand) Here's a great one that's not too difficult to whip out! Popcorn, peanuts and pretzels folded together and pressed into bar form. AND all glued together with salted caramel. OHHH looks so good!

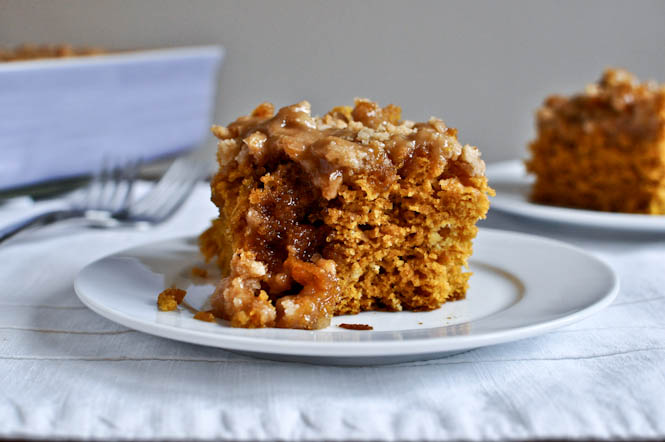
  • Here is a pumpkin recipe for all you seasonal bakers out there. Pumpkin Coffeecake. It is made from a boxed yellow cake mix, so that automatically makes it easy. This recipe even tops it off with a streusel and brown sugar glaze!

  • Familiar with the sweet treat buckeyes? Well let me introduce you to the buckeye cupcake! ohhhh boy! Can you imagine?!


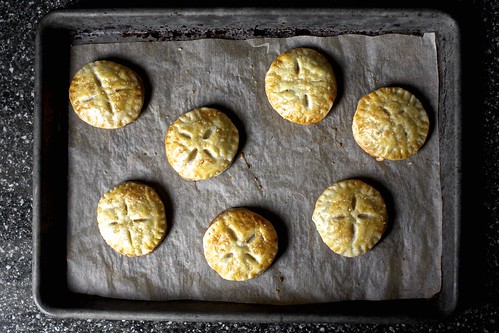
  • Can you guess what these are?? They are cute little pockets of cookie dough filled with apple pie filling! That's right, they are apple pie cookies. SO cute.

  • Now this post, you HAVE to check out this post.... it's all about how to make ammmazingly perfect corn dogs and cheese on a stick. I will be making these. That's all I have to say.

Pick of the Week:

I absolutely urge you to try the pumpkin pancakes that I shared this week. Especially if you are a pancake enthusiast. They are SO good! They make you feel like you are diving into fall. Just awesome.


Poppy Seed Lemon Cake


Don't be deceived. This isn't a lemon cake. This is a poppy seed cake. It has the nuttiness of the poppy seed, the crunchiness and the very distinct flavor. You may not think poppy seeds have much flavor because you're used to them being used sparingly. Well this cake is LOADED. No, overloaded with poppy seeds. So face it, if you don't like poppy seeds, you're not going to like this cake.

Honestly, I think it needs more lemon. Haha I first took a bite and expected the flavor of a lemon poppy seed muffin. Nope. Not even close. The original recipe calls for only 1 1/2 Tb lemon zest... I would add at least 2 Tb. 

So, if this cake isn't anything to brag about why am I putting it up here? Well, it isn't one of my top favorites, but it was still good. 

Plus the whole recipe structure is SO unique!!!

A cake comprised of a TON of egg yolks, equal parts flour, cornstarch and poppy seeds, as well as a whole cup of butter. Have you ever heard of such a thing?! It's madness. So, needless to say the texture of this cake is nothing that you have probably ever tried. And since poppy seeds aren't as ubiquitous in America as they are in Europe, the flavor is probably new to you too.


The recipe calls for an 8" bundt or tube pan. I used a 10" tube pan so it was done maybe ten minutes sooner. You have to play it by ear. 


Poppy Lemon Seed Cake
adapted from Smitten Kitchen

2/3 cup sugar
8 large egg yolks
1 large whole egg
2 tablespoons finely grated lemon zest (from 2 lemons)
1/2 cup all-purpose flour
1/2 cup cornstarch
Pinch of salt (edited to add this)
2 sticks (1/2 pound or 1 cup) unsalted butter, melted and cooled a bit
1/2 cup poppy seeds (I got this from one 3-ounce spice bottle)


Preheat the oven to 325°F Butter and flour an 8" fluted bundt or tube pan generously. (This cake very much wants to stick. Don’t let it!) Butter the dull side of a 10-inch piece of foil.

In the bowl of an electric mixer fitted with the whisk, beat the sugar with the egg yolks and whole egg at medium-high speed until the mixture is pale yellow and very fluffy, about 8 minutes. Beat in the lemon zest. Sift the flour and cornstarch over the egg mixture and fold in along with the pinch of salt with a rubber spatula. At medium speed, beat in the butter, then beat in the poppy seeds.


Pour the batter into the prepared pan and cover tightly with the buttered foil. Bake for 45 minutes, or until the cake pulls away from the side of the pan and a cake tester inserted in the center of the cake comes out clean. Remove the foil and let the cake cool in the pan on a rack for 15 minutes. Invert the cake onto the rack and let cool completely before serving, at least 30 minutes.