
Get excited. Because I am going to show you how to make a layer cake that slices into a flag each time... YES! Totally awesome, right?! I know. Let's get started, we've got work to do.

You're going to want to bake up 3 layers- one white, one blue, and one red. Feel free to use the recipe that I provided at the bottom of the page. It makes one 9" cake, so just make the recipe 3 times, changing the color each time, that way each layer comes out the same size. Unless you have concentrated food gel, the colors are going to come out a bit muted. No big deal.

Take each layer and level off the top so that they are all the same size. I used a cake leveler, it was like $2 and an awesome investment if you're into layer cakes. It's okay if the edges are a little domed. Especially for the white and red layers, you won't even be able to tell.
Next, do your best to cut the white and red layer in half evenly.

You'll want to to have a bowl or circle of paper to cut a round from the center of a layer of white and red cake. I traced the top of a bowl (about 4.5" diameter) on paper then placed
the paper circle in the center of the cake.
Cut the center circle out of the TOP layers!!
That way you don't have to worry about the domed edges when you layer the cake later.
You can either cut around the paper or sift powdered sugar around the paper
circle, remove the circle, then cut.


At this point you should have something like this (photo is missing the outer red cake circle).
You can discard the outer circles of red and white.
Now for that blue circle-
Hopefully you haven't cut it in two... because it should still be whole.
Now cut a center circle out of that as well.
Go ahead and discard that blue center circle.
(or eat it hehe...)

Alright, this is what you should have.
2 whole layers, one of red and one of white cake that were halved,
2 inner circles, one of red and one of white cake,
and a whole outer circle of blue.
Got it? Good. Now let's assemble this bad boy.

Place the whole layer of white cake on the bottom of your cake platter. If you want to be neat while frosting, place sheets of parchment or wax paper under the cake.
Spread a nice layer of frosting across the top. About 1 cup. Make sure that it is even leveled.

Place the whole red cake layer on top of the first layer and frost again.

Place the outer blue circle on top of the frosted red layer cake.
Place the inner white cake circle in the middle of the blue circle.
Frost the surface of the inner white cake circle.
Place the inner red cake circle on top of the frosted inner white cake circle.

If you want this to look decent, you'll want to frost the whole thing in a thin crumb coat before you start to really frost it. Crumbs are going to get all up in the frosting so you'll be glad you took time to do this. Unless you don't care how it looks.

Anyways, you can now frost the cake for real.
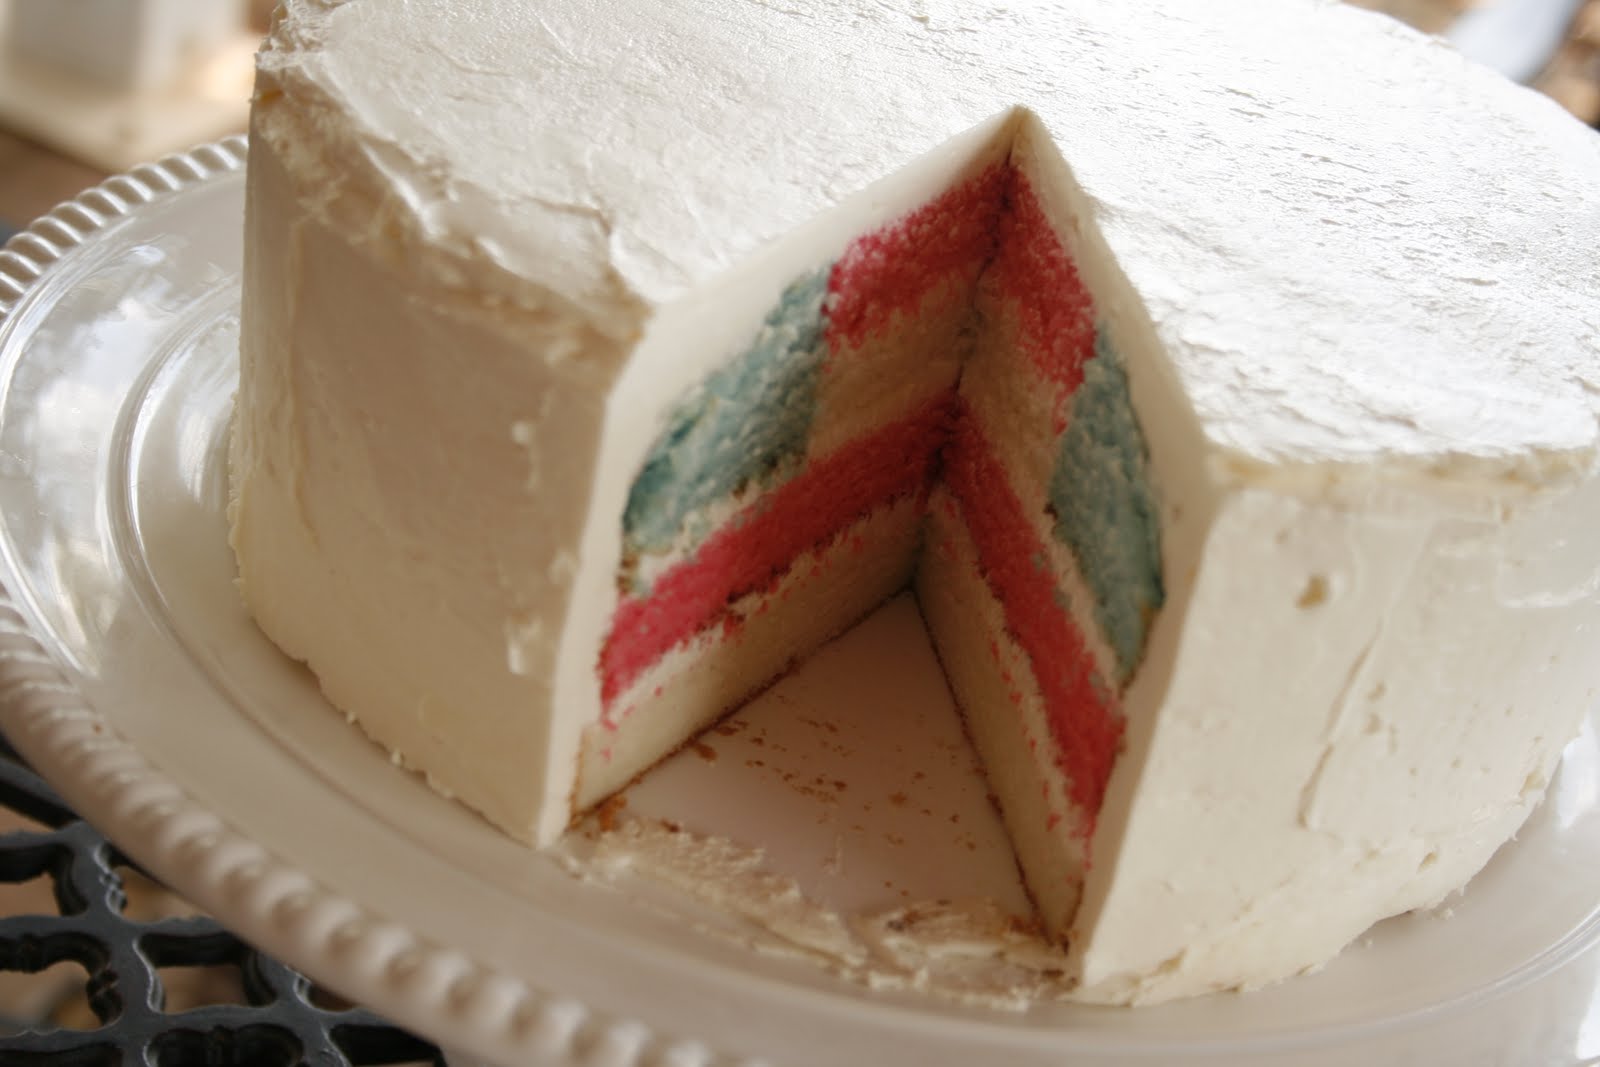
Go ahead and slice into it and be amazed!

Look at how much fun this cake is!!!
It's a flag....
It's SO cool!
I loooooove it....
If you aren't serving it right away, it will keep in the fridge. Just take it out and bring it to room temperature 2 hours before serving.
I should probably talk about the cake itself-

WHITE LAYER CAKE
SO tender. SO moist. Pretty darn easy as far as cakes go.
Mmmmmm, so good!
And the frosting?
Incredibly light and oh so velvety soft and delicious!
Better than any traditional butter cream.
- Classic White Cake
- adapted from Cooks Illustrated
- makes one 9" round cake
- Print Recipe
- 1 cup plus 2 Tb cake flour (4.5 ounces), plus more for dusting the pans
- 1/2 cup whole milk , at room temperature
- 3 large egg whites, at room temperature
- 1 teaspoons almond extract
- 1/2 teaspoon vanilla extract
- 3/4 cup plus 2 Tb granulated sugar
- 2 teaspoons baking powder
- 1/2 teaspoon table salt
- 6 tablespoons unsalted butter (1 1/2 sticks), softened but still cool
- Set oven rack in middle position. (If oven is too small to cook both layers on a single rack, set racks in upper-middle and lower-middle positions.) Heat oven to 350 degrees. Spray a 9-inch round cake pan with nonstick cooking spray; line the bottom with parchment paper round. Spray the paper round, dust the pan with flour, and invert pan and rap sharply to remove excess flour.
- Pour milk, egg whites, and extracts into 2-cup glass measure, and mix with fork until blended.
- Mix cake flour, sugar, baking powder, and salt in bowl of electric mixer at slow speed. Add butter; continue beating at slow speed until mixture resembles moist crumbs, with no powdery streaks remaining.
- Add all but 1/2 of milk mixture to crumbs and beat at medium speed (or high speed if using handheld mixer) for 1 1/2 minutes. Add remaining 1/2 cup of milk mixture and beat 30 seconds more. Stop mixer and scrape sides of bowl. Return mixer to medium (or high) speed and beat 20 seconds longer.
- Pour into prepared cake pan; using rubber spatula, spread batter to pan wall and smooth top. Bake until thin skewer or toothpick inserted in the center comes out clean, 23 to 25 minutes.
- Let cake rest in pan for 3 minutes. Loosen from sides of pan with a knife, if necessary, and invert onto wire rack. Reinvert onto additional wire rack. Let cool completely, about 1 1/2 hours.
Swiss Meringue Buttercreamadapted from "Martha Stewart Cupcakes"yield: 5 cups
Print Recipe
5 egg whites, at room temperature1 cup plus 2 Tb granulated sugarpinch of salt4 sticks (1 lb) butter, at room temperature, cut into tablespoons1 1/2 tsp vanilla extract
Combine egg whites, sugar, and salt in the heatproof bowl of a stand mixer set over a pan of simmering water. Whisk constantly by hand until mixture is warm to the touch and sugar has dissolved (the mixture should feel completely smooth when rubbed between your fingertips).
Attach the bowl to the mixer fitted with the whisk attachment. Starting on low and gradually increasing to medium-high speed, whisk until stiff (but not dry) peaks form. Continue mixing until the mixture is fluffy and glossy, and completely cool (test by touching the bottom of the bowl), about 10 minutes.
With mixer on medium-low speed, add the butter a few tablespoons at a time, mixing well after each addition. Once all butter has been added, whisk in vanilla. Switch to the paddle attachment, and continue beating on low speed until all air bubbles are eliminated, about two minutes. Scrape down sides of bowl with a flexible spatula, and continue beating until the frosting is completely smooth. Keep buttercream at room temperature if using the same day, or transfer to an airtight container and refrigerate for up to 3 days or freeze up to 1 month. Before using, bring to room temperature and beat with paddle attachment on low speed until smooth again, about 5 minutes.
Very well done. Absolutely brilliant information. I'm in love with this blog. they always provide such a great information. sandwhich Wrap
ReplyDelete